Studio Quality Portrait Photo আজকের দিনে একটি সুন্দর, আকর্ষণীয় এবং professional looking ছবি পাওয়ার জন্য আপনাকে আর হাজার হাজার টাকা খরচ করে কোনো প্রফেশনাল স্টুডিওতে যাওয়ার প্রয়োজন নেই। একটা সময় ছিল যখন সোশ্যাল মিডিয়া, লিংকডইন প্রোফাইল কিংবা বিজনেসের জন্য একটি নিখুঁত ছবি তুলতে expensive camera, দামি studio light এবং একজন দক্ষ photographer-এর পেছনে প্রচুর সময় ও অর্থ অপচয় করতে হতো। কিন্তু প্রযুক্তির ছোঁয়ায় এখন সবকিছু বদলে গেছে। এখন Artificial Intelligence (AI) প্রযুক্তির চরম উন্নতির ফলে ঘরে বসেই খুব সহজে এবং মাত্র কয়েক ক্লিকে প্রফেশনাল studio quality portrait photo তৈরি করা সম্ভব।
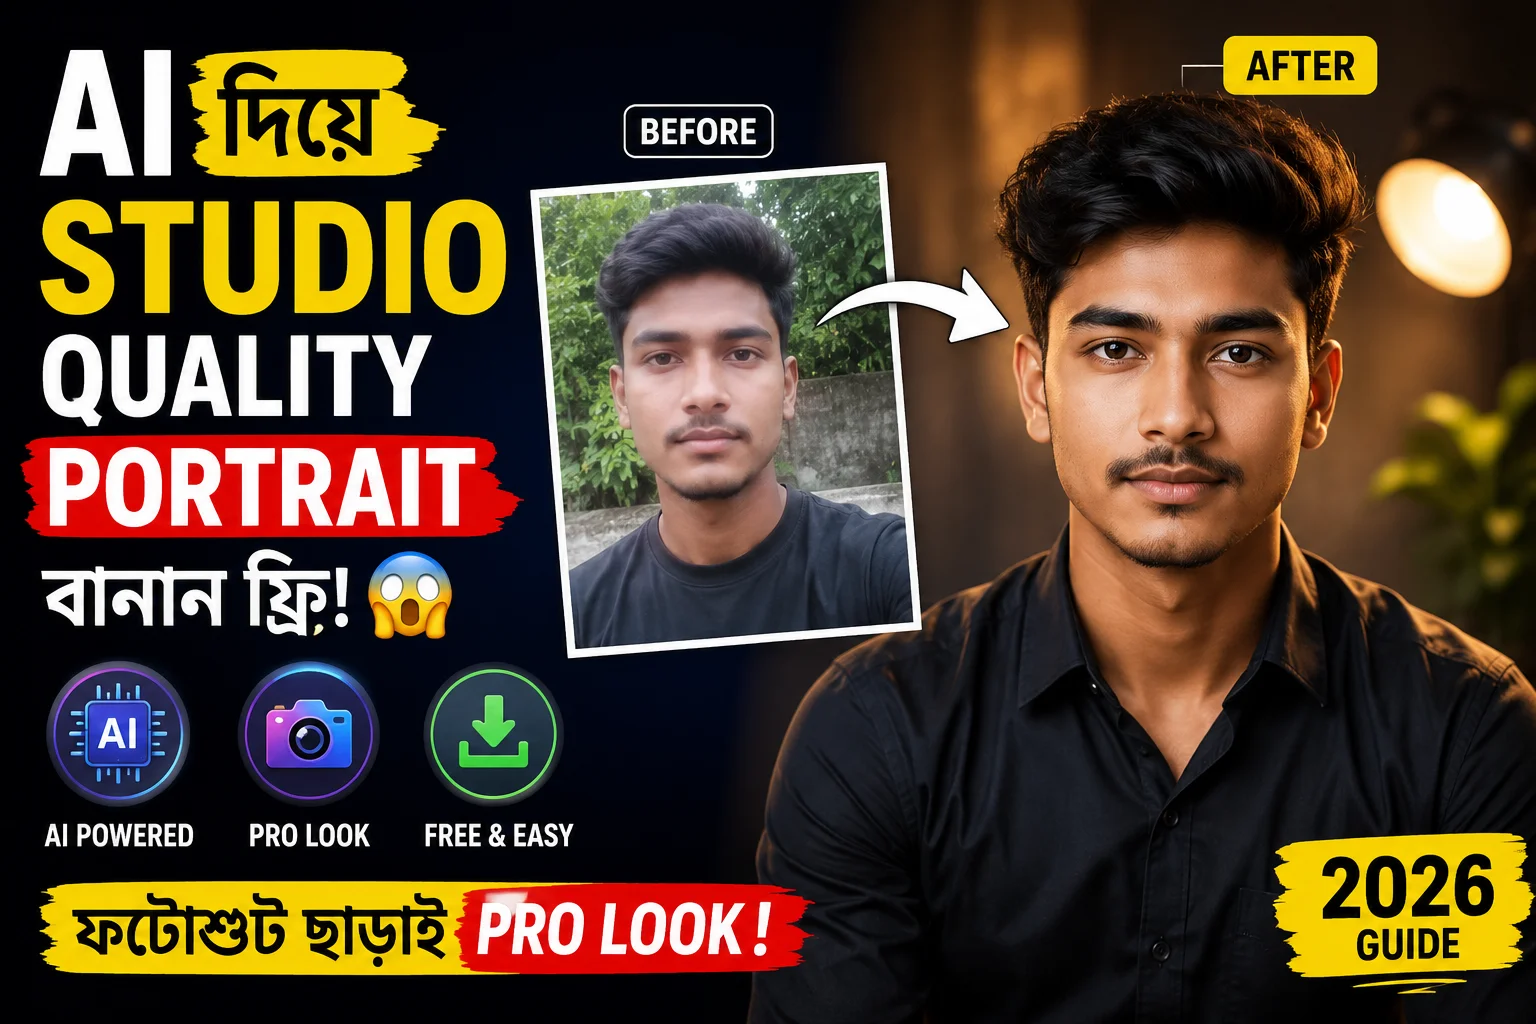
আজকের এই ডিজিটাল যুগে আপনার পার্সোনাল ব্র্যান্ডিং কিংবা প্রফেশনাল প্রোফাইল (যেমন: LinkedIn) ভারী করার জন্য একটি হাই-কোয়ালিটি পোর্ট্রেট ছবি কতটা গুরুত্বপূর্ণ, তা আমরা সবাই জানি। কিন্তু সবার তো আর দামি DSLR ক্যামেরা বা স্টুডিও সেটআপ থাকে না। এখানেই ম্যাজিকের মতো কাজ করে এআই (AI)। আপনি জানলে অবাক হবেন যে, এখন সাধারণ মোবাইল দিয়ে তোলা একটা সাধারণ বা ঝাপসা ছবিকেও আর্টিফিশিয়াল ইন্টেলিজেন্স ব্যবহার করে একদম প্রিমিয়াম লুকে রূপান্তর করা যায়, যা দেখে কেউ ধরতেই পারবে না এটি কোনো স্টুডিওতে তোলা নাকি এআই দিয়ে বানানো। Studio Quality Portrait Photo
আপনি যদি একজন কনটেন্ট ক্রিয়েটর, ফ্রিল্যান্সার, চাকুরিজীবী কিংবা সাধারণ ইউজার হয়ে থাকেন—এই পোস্টটি আপনার জন্যই! এই পোস্টে আমি একদম সহজ ভাষায় ধাপে ধাপে তোমাকে দেখাবো কিভাবে তুমি নিজের যেকোনো normal ছবিকে AI tools দিয়ে একটি নিখুঁত এবং রিয়ালিস্টিক studio quality portrait photo-তে convert করতে পারো। তাও আবার কোনো রকম জটিল এডিটিং স্কিল ছাড়াই—একদম free বা খুব সামান্য খরচে। তাহলে চলুন, আর দেরি না করে মূল প্রসেসটি জেনে নেওয়া যাক!
Table of Contents
ToggleAI Studio Portrait Photo কি?
সহজ কথায় বলতে গেলে, AI studio portrait photo মানে হলো এমন একটি ডিজিটাল ছবি যা উন্নত আর্টিফিশিয়াল ইন্টেলিজেন্স (AI) টেকনোলজি বা অ্যালগরিদম ব্যবহার করে একদম প্রফেশনাল স্টুডিও ফটোগ্রাফি স্টাইলে তৈরি, এডিট বা এনহ্যান্স (Enhance) করা হয়। বর্তমান সময়ে মিডজার্নি (Midjourney), স্টেবল ডিফিউশন (Stable Diffusion) কিংবা বিভিন্ন এআই ফেস-সোয়াপ অ্যাপের মতো টুলগুলো মানুষের ফেস স্ট্রাকচার, লাইটিং এবং ব্যাকগ্রাউন্ড খুব নিখুঁতভাবে অ্যানালাইসিস করতে পারে। এর ফলে, আপনি আপনার সাধারণ ব্যাকগ্রাউন্ডে তোলা কোনো নরমাল ছবি ইনপুট দিলে, এআই তার ব্যাকগ্রাউন্ড চেঞ্জ করে, লাইটিং ফিক্স করে এবং ফেস ডিটেইলিং বাড়িয়ে এমন একটি ফাইনাল আউটপুট দেয় যা দেখতে হুবহু কোনো হাই-এন্ড স্টুডিওর ছবির মতো লাগে। Studio Quality Portrait Photo
এই ছবিগুলো দেখতে এতটাই স্পষ্ট (Clear), শার্প (Sharp) এবং সিনেমাটিক (Cinematic) হয় যে, অভিজ্ঞ কোনো ফটোগ্রাফারও খালি চোখে আসল স্টুডিওর ছবি এবং এআই দিয়ে তৈরি ছবির মধ্যে পার্থক্য করতে হিমশিম খেয়ে যাবেন।
এই ধরনের ছবিতে সাধারণত কী কী বিশেষত্ব থাকে?
একটি সাধারণ ছবিকে যখন এআই-এর মাধ্যমে একটি প্রিমিয়াম studio quality portrait photo-তে রূপান্তর করা হয়, তখন সেই ছবিতে মূলত নিচের ৪টি মূল উপাদান বা প্রফেশনাল টাচ যোগ হয়:
১. সফট স্টুডিও লাইটিং (Soft Studio Lighting): প্রফেশনাল স্টুডিওতে ছবি তোলার সময় ছাতা বা সফটবক্স ব্যবহার করে মুখের ওপর যে মৃদু ও সুন্দর আলো ফেলা হয়, এআই ঠিক সেই Rembrandt বা Clamshell লাইটিং ইফেক্ট আপনার মুখে তৈরি করে। এতে মুখের একপাশে হালকা আলো এবং অন্যপাশে নরম ছায়া পড়ে, যা ছবিকে অনেক বেশি আকর্ষণীয় করে তোলে।
২. ব্লার ব্যাকগ্রাউন্ড বা বোকেহ ইফেক্ট (Blurred Background / Bokeh Effect): দামি লেন্স দিয়ে ছবি তুললে পেছনের ব্যাকগ্রাউন্ড যেভাবে সুন্দরভাবে ব্লার বা ঝাপসা হয়ে যায়, এআই ঠিক একইভাবে সাবজেক্টকে ব্যাকগ্রাউন্ড থেকে আলাদা করে ফেলে। এই ডিএসএলআর-লাইক বোকেহ ইফেক্টের কারণে ছবির মূল ফোকাস বা আকর্ষণ থাকে শুধুমাত্র আপনার ওপর। Studio Quality Portrait Photo
৩. হাই ডিটেইল ফেস এনহ্যান্সমেন্ট (High Detail Face Enhancement): এআই ছবিকে অহেতুক প্লাস্টিকের মতো বা ফেক মেকআপ লুক দেয় না। এটি মুখের ন্যাচারাল স্কিন টেক্সচার, চোখের মণি, চুলের স্টাইল এবং ফেসিয়াল এক্সপ্রেশন ঠিক রেখে স্কিনের দাগ বা অনাকাঙ্ক্ষিত নয়েজ দূর করে। ফলে ফেসের ডিটেইলিং হয় একদম ক্রিস্প এবং রিয়ালিস্টিক।
৪. ডিএসএলআর ক্যামেরা কোয়ালিটি লুক (DSLR Camera Quality Look): এই টেকনোলজির সবচেয়ে বড় সুবিধা হলো, এটি আপনার কম রেজোলিউশনের সাধারণ মোবাইল ফটোকেও আপস্কেল (Upscale) করে ৮৫ মিমি বা ১০০ মিমি প্রফেশনাল লেন্স এবং দামি ফুল-ফ্রেম DSLR ক্যামেরায় তোলা ছবির মতো একটি আল্ট্রা-এইচডি এবং প্রিমিয়াম লুক এনে দেয়।Studio Quality Portrait Photo
কেন AI Studio Portrait Photo এখন এত জনপ্রিয়?
বর্তমান ডিজিটাল যুগে “First impression is the last impression”—এই কথাটি সবচেয়ে বেশি খাটে আমাদের অনলাইন প্রোফাইলগুলোর ক্ষেত্রে। আজকাল সোশ্যাল মিডিয়া, ফ্রিল্যান্সিং মার্কেটপ্লেস কিংবা পার্সোনাল ও অনলাইন ব্র্যান্ডিংয়ের জন্য একটি সুন্দর এবং প্রফেশনাল প্রোফাইল পিকচার থাকা অত্যন্ত গুরুত্বপূর্ণ। আপনার প্রোফাইলের ছবি দেখেই মানুষ বা ক্লায়েন্ট প্রথম আপনার ব্যক্তিত্ব এবং পেশাদারিত্ব সম্পর্কে ধারণা নেয়। আর ঠিক এই জায়গাতেই বিপ্লব ঘটিয়েছে আর্টিফিশিয়াল ইন্টেলিজেন্স। মানুষ এখন প্রথাগত ফটোগ্রাফির চেয়ে এআই পোর্ট্রেট ফটোর দিকে বেশি ঝুঁকছে।
নিচে মূল কারণগুলো বিস্তারিত আলোচনা করা হলো, যা জানলে আপনিও বুঝতে পারবেন কেন এটি এখন বিশ্বজুড়ে এত ট্রেন্ডিং:
১. কোনো ফিজিক্যাল ফটোশুট ছাড়াই প্রফেশনাল লুক (Professional Look Without Photoshoot)
স্টুডিওতে গিয়ে ছবি তুলতে হলে আপনাকে আগে থেকে অ্যাপয়েন্টমেন্ট নেওয়া, পোশাক নির্বাচন করা, ক্যামেরার সামনে পোজ দেওয়ার মতো ঝক্কি পোহাতে হয়। কিন্তু এআই প্রযুক্তির সাহায্যে ঘরে বসে, নিজের চেনা কমফোর্ট জোনে থেকেই একদম নিখুঁত studio quality portrait photo পাওয়া সম্ভব। কোনো রকম ক্যামেরা বা স্টুডিওর আলো ছাড়াই এআই আপনাকে একজন টপ-মডেল বা কর্পোরেট এক্সিকিউটিভের মতো লুক এনে দিতে পারে।
২. সোশ্যাল মিডিয়া প্রোফাইলে চমৎকার ইমপ্রেশন (Stand Out on Social Media)
Facebook, Instagram কিংবা Threads-এর মতো প্ল্যাটফর্মে লাখ লাখ প্রোফাইলের ভিড়ে নিজের অ্যাকাউন্টটিকে আকর্ষণীয় করতে প্রিমিয়াম পোর্ট্রেটের বিকল্প নেই। এআই দিয়ে তৈরি ছবিগুলোর কালার টোন ও শার্পনেস এত চমৎকার হয় যে, স্ক্রোল করার সময় যে কারও নজর কাড়তে বাধ্য। এটি আপনার সোশ্যাল মিডিয়া প্রেজেন্সকে এক ধাক্কায় অনেক বেশি প্রিমিয়াম করে তোলে।
৩. লিংকডইন ও ফ্রিল্যান্সিং ক্যারিয়ারে বিশ্বস্ততা বৃদ্ধি (Boost LinkedIn & Freelancing Credibility)
LinkedIn, Fiverr বা Upwork-এর মতো প্রফেশনাল প্ল্যাটফর্মে একটি সাধারণ বা ক্যাজুয়াল ছবি ব্যবহার করলে ক্লায়েন্ট বা রিক্রুটারদের কাছে আপনার সিরিয়াসনেস প্রকাশ পায় না। এআই দিয়ে তৈরি করা ক্লিন ও কর্পোরেট হেডশট আপনার প্রোফাইলে একটি প্রফেশনাল ভাইব যোগ করে, যা ক্লায়েন্টের চোখে আপনার বিশ্বস্ততা (Credibility) বহুগুণ বাড়িয়ে দেয় এবং ভালো কাজ পাওয়ার সম্ভাবনা বাড়ায়।
৪. ইউটিউব এবং পার্সোনাল ব্র্যান্ডিং সহজ হওয়া (Effortless Personal Branding for Creators)
আপনি যদি একজন ইউটিউবার, ব্লগার কিংবা ইনফ্লুয়েন্সার হয়ে থাকেন, তবে আপনার ব্র্যান্ড লোগো বা ব্যানারে নিজের ছবি ব্যবহার করতে হয়। এআই পোর্ট্রেটগুলোর ব্যাকগ্রাউন্ড খুব সহজেই রিমুভ করা যায় এবং এগুলোর হাই-রেজোলিউশন কোয়ালিটির কারণে YouTube Thumbnail বা ওয়েবসাইটের ব্যানার ডিজাইনে ছবিগুলো ফাটে না বা ব্লার হয় না। ফলে পার্সোনাল ব্র্যান্ডিংয়ের কাজ হয়ে যায় অনেক সহজ।
৫. সময় এবং টাকা দুটোই বাঁচানো (Save Time and Huge Money)
একটি প্রফেশনাল স্টুডিও ফটোশুট করতে গেলে ফটোগ্রাফারের ফি, স্টুডিও ভাড়া এবং এডিটিং চার্জ মিলিয়ে বেশ বড় অঙ্কের টাকা খরচ হয়ে যায়। পাশাপশি ছবি তোলা থেকে শুরু করে ফাইনাল ডেলিভারি পেতে কয়েকদিন সময় লেগে যায়। কিন্তু এআই টুলস ব্যবহার করে মাত্র কয়েক মিনিটে, একদম ফ্রিতে বা নামমাত্র খরচে আপনি শত শত হাই-কোয়ালিটি পোর্ট্রেট জেনারেট করে নিতে পারছেন।
৬. কোনো রকম জটিলতা ছাড়া মোবাইল দিয়েই সম্ভব (Easy Mobile Accessibility)
সবচেয়ে মজার বিষয় হলো, এই কাজটির জন্য আপনার কোনো হাই-এন্ড কম্পিউটার বা জটিল ফটোশপ স্কিলের প্রয়োজন নেই। আপনার হাতের সাধারণ স্মার্টফোনটি ব্যবহার করেই বিভিন্ন এআই অ্যাপ বা ওয়েবসাইটের মাধ্যমে যেকোনো সময়, যেকোনো জায়গায় বসেই এই চমৎকার ছবিগুলো তৈরি করে নেওয়া যায়।
AI Studio Portrait Photo বানানোর Free Way (Step-by-Step)
আর্টিফিশিয়াল ইন্টেলিজেন্স ব্যবহার করে নিজের একটি সাধারণ ছবিকে প্রিমিয়াম পোর্ট্রেটে রূপান্তর করা এখন জলভাত। তবে এর জন্য সঠিক প্রসেসটি জানা জরুরি। নিচে একদম সহজ ভাষায় স্টেপ-বাই-স্টেপ গাইড দেওয়া হলো, যা ফলো করে আপনি সম্পূর্ণ ফ্রিতে বা খুব কম খরচে নিজের জন্য একটি চমৎকার studio quality portrait photo তৈরি করে নিতে পারবেন:
🔹 Step 1: পারফেক্ট ছবি নির্বাচন করুন (Image Selection)
এআই নিখুঁত কাজ করার জন্য আপনার ইনপুট ছবিটির কোয়ালিটি ভালো হওয়া জরুরি। “Garbage in, garbage out”—অর্থাৎ আপনি যেমন ছবি দেবেন, এআই তেমন আউটপুট দেবে। তাই ছবি সিলেক্ট করার সময় নিচের বিষয়গুলো মাথায় রাখুন:
ফেস ফোকাস: এমন একটি সেলফি বা নরমাল ছবি বেছে নিন যেখানে আপনার মুখমণ্ডল (Face) একদম সোজা এবং পরিষ্কারভাবে দেখা যাচ্ছে।
লাইট ও কোয়ালিটি: খুব বেশি ব্লার (Blur), কাপাকাপা বা অন্ধকার ঘরের ছবি ব্যবহার করবেন না। দিনের আলোতে বা ঘরের লাইটের নিচে তোলা পরিষ্কার ছবি সবচেয়ে ভালো রেজাল্ট দেয়।
চোখের পজিশন: সোজা ক্যামেরার দিকে তাকিয়ে আছেন এমন ছবি ব্যবহার করলে এআই চোখের মণি ও দৃষ্টি একদম ন্যাচারাল রাখতে পারে।
🔹 Step 2: সেরা AI Tool নির্বাচন করুন (Choose the Right AI Tool)
ইন্টারনেটে অনেক পেইড টুল থাকলেও, আপনি ফ্রিতে অসাধারণ সব পোর্ট্রেট তৈরি করতে পারবেন নিচের এই জনপ্রিয় এবং পাওয়ারফুল এআই টুলসগুলো ব্যবহার করে:
Leonardo AI: বর্তমানে ইমেজ জেনারেট এবং ইমেজ-টু-ইমেজ (Image to Image) কাজের জন্য এটি অন্যতম সেরা ফ্রিতে ব্যবহারযোগ্য টুল। এর ‘Image Guidance’ ফিচার দিয়ে সহজেই ফেস সোয়াপ বা স্টুডিও লুক দেওয়া যায়।
Microsoft Designer: মাইক্রোসফটের এই ফ্রি টুলটি দিয়ে খুব সহজেই যেকোনো সাধারণ ছবিকে প্রফেশনাল ব্যাকগ্রাউন্ড এবং স্টুডিও লাইটিংয়ে কনভার্ট করা সম্ভব।
SeaArt AI বা Clipdrop: এই প্ল্যাটফর্মগুলোতে “AI Face Swap” এবং “Portrait Enhancement” এর চমৎকার সব ফ্রি ফিচার রয়েছে, যা ফেসের ডিটেইলিং নষ্ট না করে ব্যাকগ্রাউন্ড ও লাইটিং বদলে দেয়।
🔹 Step 3: সঠিক প্রম্পট ব্যবহার করুন (Mastering the Prompt)
এআই-কে দিয়ে আপনার মনের মতো কাজ করিয়ে নেওয়ার মূল চাবিকাঠি হলো “Prompt” বা টেক্সট কমান্ড। আপনি এআই টুলের প্রম্পট বা ডেসক্রিপশন বক্সে যত নিখুঁত বিবরণ লিখবেন, আপনার studio quality portrait photo তত বেশি রিয়ালিস্টিক ও জীবন্ত হবে। বিশেষ করে টেক্সট-টু-ইমেজ বা ইমেজ গাইডেড জেনারেশনের ক্ষেত্রে প্রম্পটের গুরুত্ব অপরিসীম।
আপনার সুবিধার্থে নিচে ১০টি হাই-কোয়ালিটি, ইউনিক এবং আল্ট্রা-রিয়ালিস্টিক রেডিমেড প্রম্পট দেওয়া হলো। এগুলো আপনি সরাসরি কপি করে যেকোনো ভালো AI Image Generator-এ (যেমন: Leonardo AI, Midjourney) ব্যবহার করতে পারেন:
1. Professional Studio Portrait (Upgraded)
“A professional studio portrait of a young 25-year-old South Asian man with sharp facial features, well-groomed short hair, and a confident smile. Photographed from the chest up. He is wearing a crisp, tailored navy blue blazer over a clean white shirt. The lighting is soft, utilizing a classic Rembrandt setup with a large softbox to create gentle highlights on one side of his face and subtle, soft shadows on the other. The background is a dark, textured cinematic slate-grey studio backdrop with a faint, warm rim light outlining his shoulders to separate him from the background. Captured with a high-end DSLR camera, 85mm lens at f/1.4, creating a shallow depth of field with a beautifully blurred, creamy bokeh background. Ultra-realistic, high-fidelity details, visible skin pores, natural skin texture, and sharp focus on the eyes, 4k resolution, cinematic color grading.”
2. Moody Studio Portrait (Upgraded)
“An ultra-realistic, moody studio portrait of a man with intense eyes and a serious expression. Close-up shot focusing on the face. The lighting is dramatic and low-key, with a single harsh light source coming from the side (split lighting), casting deep shadows across half of his face while highlighting the intricate textures of his skin. High detail skin rendering showing realistic pores, subtle stubble, and fine lines. The color palette is desaturated with deep cinematic tones, earthy greens, and muted shadows. The focus is razor-sharp on the iris of the eyes, capturing realistic reflections of the studio environment. High contrast, atmospheric, shot on a 100mm macro lens, high-end photography, cinematic composition, hyper-detailed.”
3. Modern Studio Headshot (Upgraded)
“A modern corporate studio headshot of a professional looking directly into the camera with a welcoming, friendly smile. Bright and airy atmosphere. The person is dressed in smart-casual modern attire. The background is a clean, minimalist off-white seamless studio wall. The lighting is professional and even, using a large clamshell lighting configuration with a beauty dish from the front to eliminate harsh shadows and create perfect, round catchlights in the eyes. Magazine style portrait, perfectly balanced exposure, clean lines, sharp details, polished look, ideal for high-end editorial features, commercial quality, 8k resolution.”
4. Cinematic Photo with Warm Light (Upgraded)
“A cinematic portrait photo capturing a candid moment of a young man looking slightly away from the lens. The scene is bathed in a warm, golden hour light filtering through a large studio window from the side, creating soft, long shadows and a cozy, nostalgic atmosphere. The color grading features warm amber tones and rich, deep contrast. Professional DSLR quality, captured on a full-frame sensor with a 50mm prime lens, natural skin tones, realistic fabric texture of a knit sweater. The background is softly out of focus, showing a glimpse of a warm-toned, tastefully decorated indoor studio space with soft ambient light, photorealistic, cinematic frame.”
5. Fashion Style Editorial Portrait (Upgraded)
“A high-fashion style studio portrait featuring an avant-garde editorial look. The model is posing confidently with a sharp, artistic expression. Dramatic and high-contrast lighting (chiaroscuro effect) that sharply defines the cheekbones and jawline. The wardrobe is stylized, featuring a structured, textured black leather jacket. Deep blacks and vibrant highlights dominate the scene. The makeup is flawless yet realistic, accentuating the facial structure. The background is a solid, deep charcoal gray with a subtle gradient effect. Shot on a medium format camera, editorial layout style, crisp focus, hyper-realistic garment textures, high fashion magazine cover quality.”
6. LinkedIn Professional Headshot (Upgraded)
“A premium LinkedIn professional headshot of a confident executive. Corporate and trustworthy vibe. The subject is wearing formal business attire, a well-fitted dark suit jacket. The background is a neutral, non-distracting light gray with a soft, natural gradient. The lighting is clean, bright, and perfectly diffused to highlight the face without causing any glare or harsh reflections. Sharp focus on the entire face, natural looking skin, clean haircut, professional demeanor. High-resolution commercial photography, optimized for corporate profiles, clean background, sharp details, 4k UHD.”
7. Dark Studio Portrait with Neon (Upgraded)
“A dark, atmospheric studio portrait with a cyberpunk and cinematic vibe. Cyber-noir style. The subject’s face is illuminated by a sharp, dual-tone neon light reflection—vibrant cyan from the left side and deep magenta from the right side, cutting through the darkness. The center of the face shows ultra-detailed features, including realistic wet-look skin reflections and sharp focus on the pupils. The background is completely dark, filled with a subtle, thin layer of studio smoke or haze that catches the colorful neon glow. Cyberpunk aesthetic, high contrast, dramatic shadows, moody composition, hyper-realistic, 8k resolution.”
8. Soft Light Natural Portrait (Upgraded)
“A soft light portrait focusing on natural beauty and authentic expressions. The lighting is incredibly soft and wrapped around the subject, mimicking a bright overcast day inside a studio. Natural, unedited skin tone rendering with visible pores, freckles, and soft textures without any heavy airbrushing look. The subject has a gentle, calm expression. The studio background is a soft beige color, completely seamless. Shot with an 85mm lens at a wide aperture, producing a very smooth transition from the sharp focus of the face to the softly blurred shoulders. 8k ultra quality, hyper-realistic, organic look, pure photography.”
9. Modern Influencer Style Portrait (Upgraded)
“A modern lifestyle influencer style portrait with a trendy, aesthetic vibe. The subject is posing casually, looking relaxed and stylish in modern streetwear. The background is a blurred, aesthetic loft studio with warm fairy lights and indoor green plants creating beautiful, glowing bokeh circles. The lighting is bright and trendy, combining natural window light with subtle studio fill light to give a glowing skin effect. Instagram aesthetic, youth culture, vibrant color palette, rich textures, professional photoshoot quality, shallow depth of field, natural yet polished look.”
10. Minimalist Studio Portrait (Upgraded)
“A minimalist studio portrait focusing entirely on the subject with zero distractions. The background is a stark, pure white seamless backdrop. The lighting is intentionally set up to create a single, soft, elegant shadow on the white wall behind the subject, adding depth to the composition. Clean, sharp lines and a high-end DSLR realistic look. The subject is wearing a simple, solid-colored t-shirt. Perfect exposure, balanced contrast, extreme sharpness on the facial features and clothing texture. High minimalism, modern art gallery style, hyper-detailed, clean and crisp 4k output.”
🔹 Step 4: এআই সেটিংস ও স্টাইল ঠিক করুন (Configure Settings)
টুলগুলোতে ছবি আপলোড করার পর এবং প্রম্পট লেখার পাশাপাশি কিছু টেকনিক্যাল সেটিংস ম্যানুয়ালি ঠিক করে দিতে হয়। এতে ছবি ফেক বা প্লাস্টিকের মতো লাগে না:
Image Guidance/Strength: ইমেজ-টু-ইমেজ ব্যবহার করলে স্ট্রেন্থ (Strength) বা ইনফ্লুয়েন্স ৪০% থেকে ৬০% এর মধ্যে রাখুন। বেশি দিলে আপনার আসল চেহারাই বদলে যাবে, আর কম দিলে স্টুডিও ইফেক্ট আসবে না।
Lighting Mode: স্টাইল বা ফিল্টারের অপশন থাকলে ‘Studio Lighting’ বা ‘Cinematic’ মুড সিলেক্ট করুন।
Resolution: আউটপুট সবসময় High Resolution (যেমন: 2K বা 4K) সিলেক্ট করে দিন যাতে ছবি ডাউনলোডের পর ফেটে না যায়।
🔹 Step 5: জেনারেট এবং সেরা ভার্সনটি ডাউনলোড করুন (Generate & Download)
সবকিছু সেট হয়ে গেলে ‘Generate’ বাটনে ক্লিক করুন। সাধারণত এআই টুলগুলো একসাথে ৩ থেকে ৪টি আলাদা আলাদা স্টাইলের ছবি তৈরি করে দেয়। সেখান থেকে যে ছবিটিতে আপনার ফেস সবচেয়ে ন্যাচারাল এবং ব্যাকগ্রাউন্ড সুন্দর এসেছে, সেটি সিলেক্ট করে হাই-কোয়ালিটিতে ডাউনলোড করে নিন। মনের মতো না হলে প্রম্পট একটু এদিক-ওদিক করে আবার ট্রাই করতে পারেন।